All you need to know to deploy your node app to heroku

Now a days mern stack is becoming more popular and many developers are developing their web applications using node js.
In this blog we are going to see how we can deploy our node js application to heroku in easy and simple steps.
In this article we will go in detail how we deploy our node app to heroku. So stick to the article till the end.
Before we get started
make sure you have an heroku account. If you don't have one , create one here
Also you need to install heroku CLI, which helps to delpoy our app to heroku .Install it here
I would not be going into much detail about how to create a node js application . Before we get started make sure you also have a node js application which is ready to be deployed.
Let's first create a app on our heroku account. You can see there is a option to create an app at the top right corner . When you click it asks a name for your app and then later you can create your app .
For the demo purpose I have created a node-deploy-tutorial app.
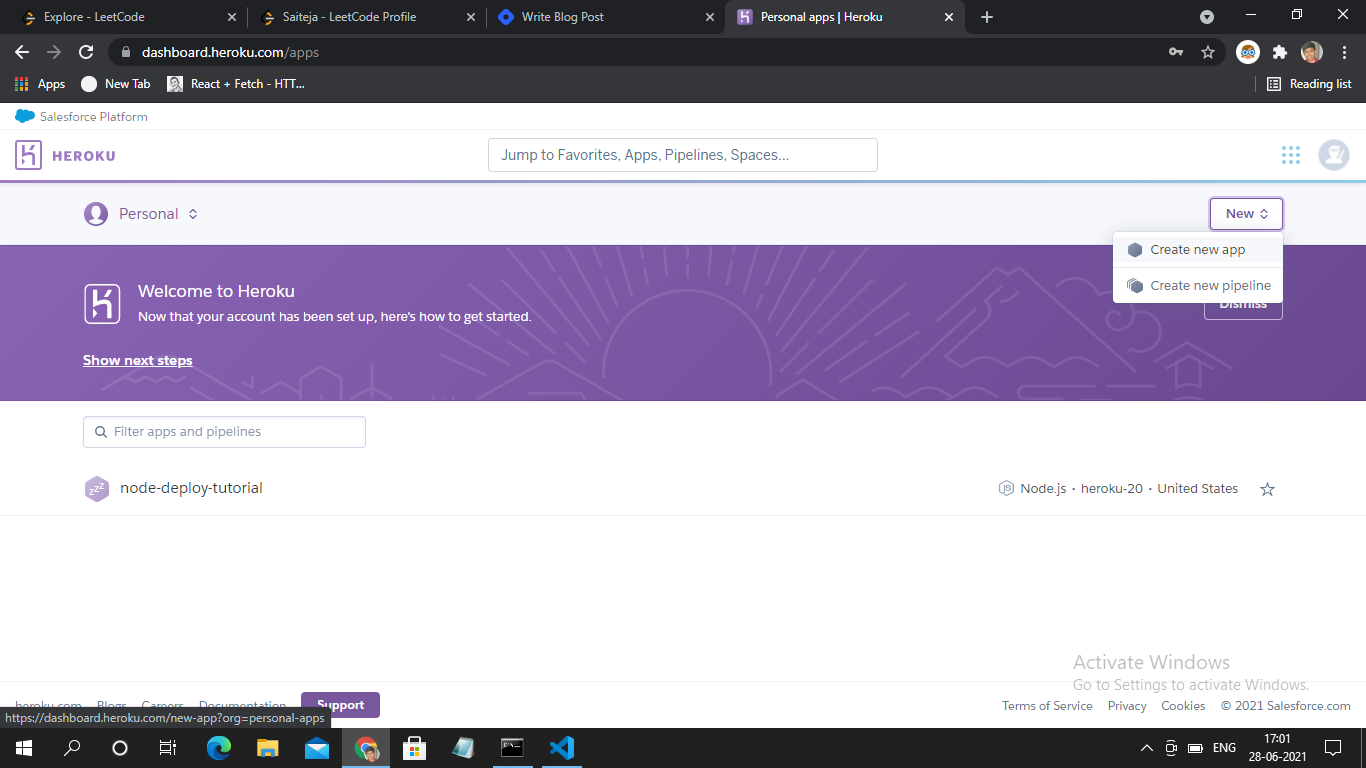
I have created a simple node js application running on port 5000, which displays "hello world"

Before deploying your app
we have to make some changes to our node application to work it on heroku.
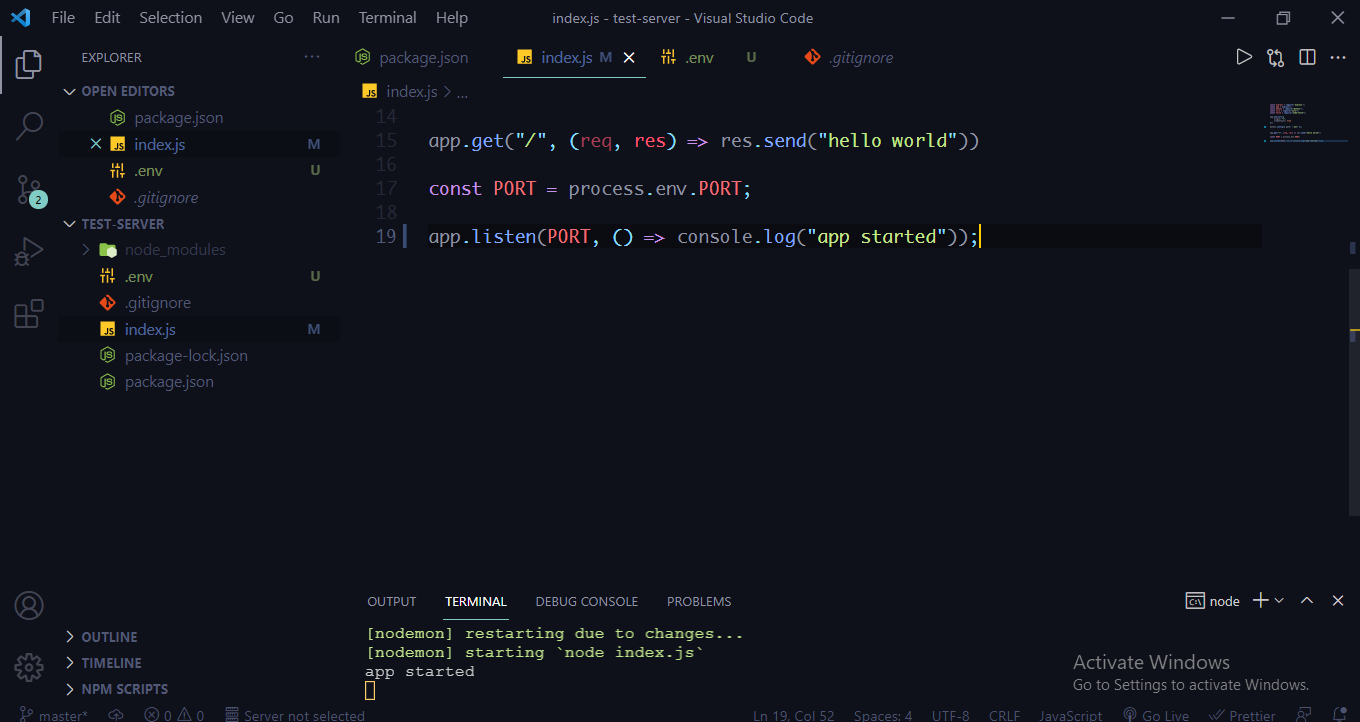
1. Changing PORT
we are currently running our node app on default PORT 5000. But this not gonna work when we deploy because heroku has its separate PORT numbers which uses to run our application. So import port number from .env file by
const PORT= process.env.PORT;

2.Adding start scripts
We have to add start scripts in our package.json file. when ever we deploy our node app heroku doesn't know how to start our application. So it searches for a start scripts and executes the start script.
"scripts":{
      "start": "node index.js",
       ...
}
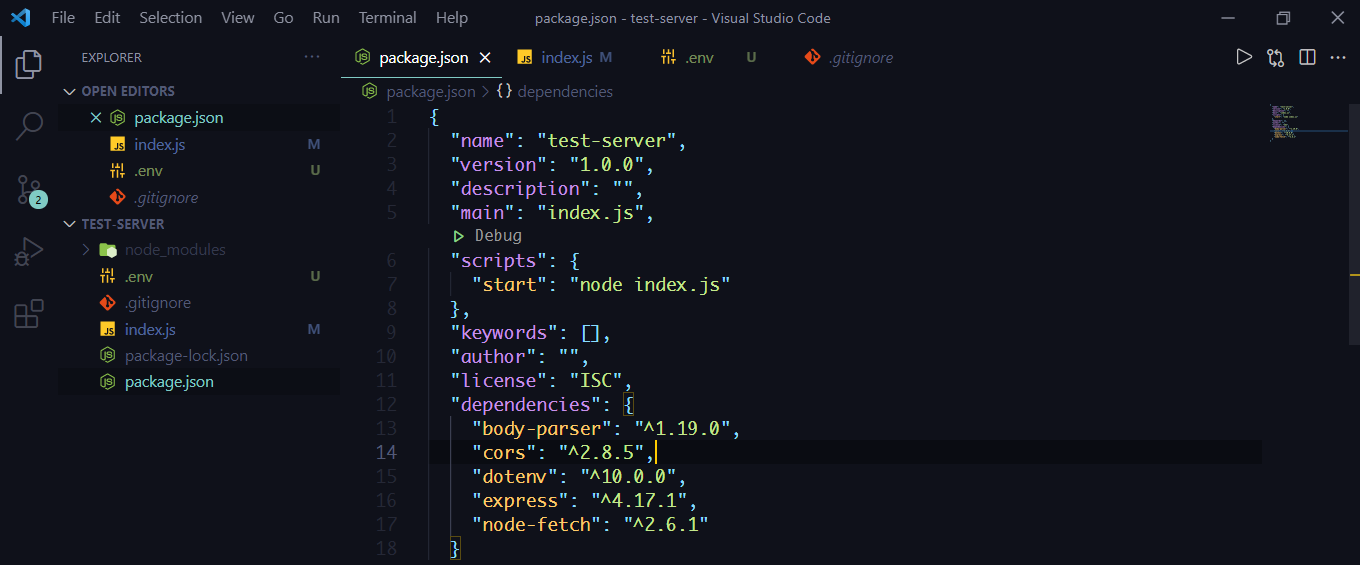
Here index.js is the file I have been using if its different from your file name just replace the index.js with {yourFileName}.js
3.Adding files in .gitignore
we have to add the folders and files which are not necessary for our deployment process. I will be adding the node_modules and .env file to .gitignore as they are not needed.

Let's deploy our Node app
If you haven't already logged in , Log in to your heroku account by running command heroku login in your terminal
heroku login
Now we are ready to start deploying our node application to heroku. We will be also using git to deploy our app.
1. Initialize an empty git repository
To create an empty git repository type git init in terminal. Make sure you are in the same directory of your node app
git init
2 . Add files
Add all the files to local repository by
git add .
The files which we have included in .gitignore file are not going to include in our local repository.
3.commit changes
To commit changes run the command
git commit -m "initial-commit"
I gave my commit a message of "initial-commit", You can add your own message to the commit
4.Adding origin
To add the heroku app origin to your local repository run the command
heroku git:remote -a {app-name}
In my case my app name is node-deploy-tutorial. So the command becomes
heroku git:remote -a node-deploy-tutorial
5.Deploy
To deploy your app run the command
git push heroku master
Here master is the branch which we are working upon in our local repository .
After running the above command, it starts building our application for the deployment. It takes some time. After the command is executed you can go to your-app-name.herokuapp.com and now your node app is deployed successfully. You can checkout my app which I deployed for this demo purpose on - node-deploy-tutorial.herokuapp.com
That's it guys! In the next blog we will be seeing how to deploy our node app to heroku using github. Because when we had some changes in our node app and inorder to reflect those changes to our heroku app we again need to add the files and commit them and again pushing the changes to heroku by git push heroku master. This is a time taking process . So in the next article we are going to see how deploying our app to heroku through github saves our time .
If there is something I am missing, Please let me know in the comments.
Let's connect on twitter
Happy coding!


